Set up Obsidian URI handling on Linux
Obsidian has a cool API where you can construct Obsidian URIs to issue various commands. The way it works is that you have a URI like this:
obsidian://open?vault=my%20vault&file=my%20noteWhen opened with Obsidian, this opens a note called “my note” in a vault called “my vault” (if it exists). This works if you enter the above URL into any web browser.
Each operating system has a different way to support such URIs. In Linux, this mechanism is called XDG.
Note: you must have a desktop / GUI environment for this to work - no headless servers.
There are two options on how to set up Obsidian UI handling on Linux: you can set it up for a particular user (especially useful if you’re using a Linux machine that’s managed by someone else, for example at work) or for everyone. Choosing the second option requires root access.
Note: The single-user guide currently doesn’t work for Chrome for some reason. Waiting for answers on my Unix & Linux Stack Exchange question: Custom URI handling: xdg-open and Firefox work, but Chrome doesn’t
If anyone has any leads into how to solve this, I’d appreciate it if you could share your findings in the comment section below.
Setting Up URI Handling for a Single User
1. Install dependencies if needed:
$ sudo apt install xdg-utils desktop-file-utils
2. Download the latest Obsidian [[AppImage]] file from the Obsidian homepage and put it somewhere where you can reference later1. We’ll use ~/obsidian/, but this can be anywhere you’d like:
$ mkdir -p ~/obsidian
$ wget https://github.com/obsidianmd/obsidian-releases/releases/download/v0.12.15/Obsidian-0.12.15.AppImage -O ~/obsidian/Obsidian.AppImage
3. Optional: download an image file to serve as an icon (thanks Craig from the Obsidian Discourse!):
wget https://forum.obsidian.md/uploads/default/optimized/2X/6/6df43bc4ee96f0a1b67ff3600caf6879b758a743_2_500x500.png -O ~/obsidian/icon.png
4. Give the AppImage execute permission:
$ chmod +x ~/obsidian/Obsidian.AppImage
5. Run the AppImage file:
$ ~/obsidian/Obsidian.AppImage
The Obsidian GUI should open up. Make sure you either already have a vault or create a new one. I’m assuming below that the vault name is notes, change to whatever vault name you used accordingly. You can close Obsidian now.
6. Let’s make sure that nothing is currently trying to open obsidian:// URIs:
$ xdg-open "obsidian://new?vault=notes&name=note&content=content"
gio: obsidian://new?vault=notes&name=note&content=content: The specified location is not supported
Cool. That’s how we’ll check that everything works when we’re done (the quotes are there so the shell doesn’t parse the & character).
7. Now we’ll create a .desktop file for our AppImage file. We’ll put it under ~/.local/share/applications/. First, make sure the directory exists :
$ mkdir -p ~/.local/share/applications/
8. Now let’s write our file. Create a new file called obsidian.desktop in the above directory with the following content:
[Desktop Entry]
Name=Obsidian
Exec=/home/rachum/obsidian/Obsidian.AppImage %u
Terminal=false
Type=Application
Icon=/home/rachum/obsidian/icon.png
StartupWMClass=obsidian
X-AppImage-Version=0.8.15
Comment=Obsidian
Categories=Office;
MimeType=text/html;x-scheme-handler/obsidian;
Some notes on the .desktop file:
- Don’t omit the
%uin theExecline! It makes sure the URI is passed to theAppImagefile when invoking it. - Use full paths without the tilde (
~) sign. My username israchumso I used/home/rachum. Use your username instead. - If you haven’t downloaded the Obsidian icon, remove the
Icon=line from the file - it will make the desktop file invalid. - The
MimeType=line is where most of the magic happens. It registers Obsidian to handleobsidian://URIs. - There should be no trailing whitespaces on any line. In particular, trailing whitespaces in the
Icon=line results in the icon not being displayed.
9. Run the following2 to read our newly created obsidian.desktop file (if things break for some reason and you’re trying to debug this process, you can add the -v flag to have more detailed output):
update-desktop-database ~/.local/share/applications/
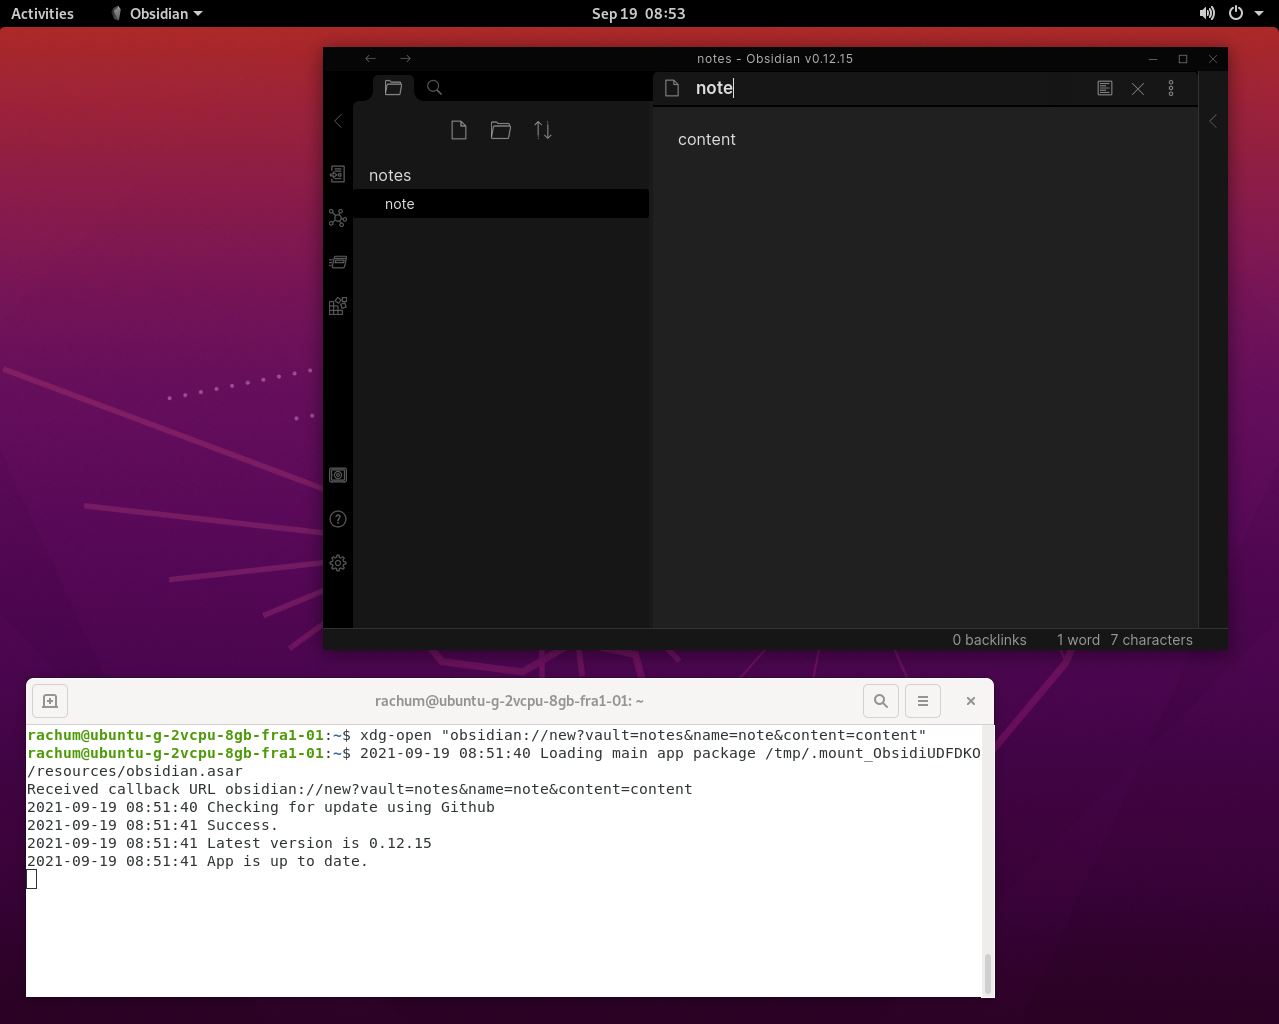
10. Make sure everything works by running xdg-open again:
$ xdg-open "obsidian://new?vault=notes&name=note&content=content"
This should open the Obsidian UI focused on the newly-created note:
Setting Up URI Handling for All Users
The above instructions are for setting up Obsidian URI handling for your own user. If you want to set it up for all users, make the following changes:
- Run everything with a user that has administrative (sudo / root) privileges
- Put the
AppImagefile in a non-user directory (e.g.,/opt/obsidian/) - Create the
obsidian.desktopfile in/usr/local/share/applications/ - Run
update-desktop-databasewithsudo
References
- Obsidian URI set up for Linux / obsidian.desktop (Obsidian Discourse)
- Desktop entries
- Create a custom URL Protocol Handler (Unix & Linux Stack Exchange)
- Desktop Entry Specification: The
Execkey - (GitHub) clearlinux/distribution:
update-desktop-databasenot working as expected #670 - XDG Base Directory Specification
- Custom protocol handlers Linux, Centos 7 for chrome
Obsidian AppImage binaries check for updates on each run, so it’s generally safe to omit the version from the file name. ↩︎
The XDG Base Directory Specification claims that “
$XDG_DATA_HOMEdefines the base directory relative to which user-specific data files should be stored. If$XDG_DATA_HOMEis either not set or empty, a default equal to$HOME/.local/shareshould be used.” However, I found through experimentation that this isn’t the case. Because of this, we’ll manually specify the directory when callingupdate-desktop-database. ↩︎
Follow me on Twitter and Facebook